Again we did a radial survey, using a dumpy level, compass and measuring tape. From it I was able to draw the survey at 2D which has the boundary, where lawn was and North point:
As before I use this 2D outline to create a basic design. This is the only part of the process that is done with paper and pencil - these are just fairly small thumbnail printouts, which allows some basic design work which provides the basis for the final design. The brief was to clear the garden, create contemporary terracing and include a path to the front door. This curvy path concept was created:
These get scanned and imported into Photoshop, where they are given a bit of colour for the presenting:
Next I was able to use the heights we'd taken at all the key points to create a 3D contoured plan. This is done using Sketchup Sandbox tools (the From Contours option), which gave me this model:
I then also import the scanned concept drawing into Sketchup which allows me to create a properly scaled paths, walls but more importantly see how those will work in the context of the sloping ground. First, get the 2D elements working:
Then using my survey data, drag up all the walls, steps and path to the heights - really easy to do in Sketchup using the Push/Pull tool. This gives me a model which looks like it has really scary tall walls:
But once it is merged with the 3D model of the survey, then where steps and walls work (or don't!) become apparent:
As well as being able to double check whether this design makes any sense to build, I find it a really useful tool for presenting to clients, so as well as showing them the Photoshop concepts I have this model which I can show them. I take my laptop and am able to let them see how it feels walking up the path, view from the house etc. Really invaluable I find, especially for gardens with as many level changes as this.
Now for the final polished Photoshop treatment - this is a mounted board that gets given to the client.
The next phase is where Sketchup really comes even more in to its own . It allows me to give the contractor 3D views and lots of measurements to not only price but build the garden. Each area of paving, walls, gravel paths is calculated automatically, so can be labelled easily and it is great for setting out on site too.
As well as measurements I can triangulate off known points (the bottom step on the left hand side) to get exact dimensions and curves of walls. Genius, accurate and much less work than mucking about with a scale ruler I reckon.
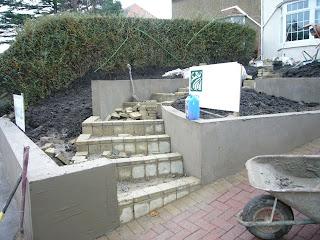
Anyhow, build went very well and here are some pics of during and finished.
This is it all rendered and then painted in shade matched with exterior paint:
It got planted at the start of May this year, and looked like this (excuse the dirty walls, I hadn't hosed them down yet!):
This is it only 7 weeks later, bit of a grey rainy day, need to go back and photograph when it's sunny.
Although it was a pretty small garden, I would have found it much more daunting and difficult to tackle if I hadn't used Sketchup to realise the levels, paths and walls and using that same outline to create final drawing for client in Photoshop. Throw away your drawing boards and don't spend a penny more on pencils & tracing paper!


10 comments:
Excellent article. I shall be robbing your Sketchup tips!
Thanks Anna. Have fun, let me know if I can help with anything you get stuck with, find it a bit trial and error.
Thanks for posting that Tracy - it was good to see those 3D models again. Note to self: MUST find time to get to grips with sandbox tools....
I'm just learning how to use both photoshop and sketchup in garden design and found your article really useful and easy to follow - just hope I can put it into practice!
Thanks for comments - still learning, toying with some Sketchup training, it's still taking me far too long to finish models. But getting there!
Very nice article,. good work there, need to spend time with photoshop and sketch up myself! great results Tracy, not bad job either too!
karl
Hi Tracy!
Great tips :)
How do you deal with larger gardens? Do you use SketchUp too? I find it time consuming to draw larger gardens in any CAD software but hand drawing is not the best idea either... Any tips on that?
Thank you
Maria Pelczar
Hi - I saw your Sketchup garden designs and really like them. You have great skill.
I've got a 60 foot garden that I have re-designed myself on paper. I would love to have it put into sketchup. Can you do that for a fee? How much would it cost? Thanks
Much thanks for this incredible post.
hegn i haven
Interesting post Tracy, I recently used Google Sketchup for a garden on a slope and it was great to compare the existing slope (survey) with the new design. What do you use for your shrubs in plan view on Photoshop ? They look good. Are they brushes ?
Post a Comment